Saturday, September 14, 2024

Cake 101

START WITH:

Cake recipe - or use a box mix

Frosting recipe

Practice Practice Practice

MUST HAVE TOOLS:

Offset spatula

Aluminum pans (not black)

Cake Leveler - or use knife and toothpicks to mark

Decorating bags - can use ziplocs

Tips/couplers (optional)

Food Color Gel is best-use a clean toothpick each time


To purchase supplies:

You can find certain items at Walmart, Hobby Lobby, JoAnne's, etc. plus Karen Annes on Gravois 

(or a cake supply store near you) 

Boards/boxes/foil/bags/tips/cake filling

Bake Cake –box mix (betty crocker is my fave) – mix in eggs & oil then slowly add water to get a cake with no large air pockets

    extra egg / butter instead of oil / milk(coconut) instead of water / dry pudding mix

    lower the temp / use insulator strips / rotate pans

    1 Mix yields 4 cups batter / approx. 2 lbs.

    use 2 or 3 leftover yolks to sub for no more than 1 egg per mix

    remove all but 1 yolk per white mix to get a light fluffy cake that still cuts well

USE BAKER’s JOY*** or DIY goop/cake release (see below)

Insulator strips (can make your own) work very well.

Here's a link to make your own.

https://www.wyldflour.com/how-to-make-an-insulated-cake-strip-step-by-step-pictures/#:~:text=There%20are%20several%20techniques%20for,And%20it%20works%20for%20me.

You could also just cut up some towels. Don't have them dripping wet when you wrap them around your pan.


Cool / Split / Level

Fill – build a dam / then use frosting or cake filling (not both)

    place top cake (cut sides together)/ and smooth/close side gap

    (pipe a bit of frosting around the gap and smooth it with a spatula w/no regard to crumbs)

    Crumb Coat – if necessary (I find this just makes top coating more difficult)

    Some people refrigerate or freeze a cake after applying a crumb coat and then they do the top coat.

    I only do this a crumb coat on ‘cut’ cakes or when I’m building something

Frost – can use part or all butter but won’t work as well 

    Smooth with Viva (printer paper or parchment paper will also work)

        can make an imprint with a textured towel or a 

        clean piece of ‘non-slip’ or impression mats (aliexpress)
    Frosting can be made ahead and refrigerated or frozen – bring to room temp before using

Decorate – piping bags / tips / color icing

    Can use Ziploc bags or parchment paper cones 

    Border / write

2 days prior to serving – Bake cakes - cool in pan till you can ‘hold’ it

(Larger cakes should cool longer so they don't crack when you dump them out)

 A-dump out and cool ‘as is’ on the bottom of the cake pan

 B-level off the top & then cool cut side down (again on the bottom of the pan)  

 C-fill cake (and close gap) – let sit overnite (this minimizes the side bulge look) 

1 day prior to serving (or the day of if you have the time) – (Bake cupcakes) 

Frost / smooth / decorate

Pan

Svgs (2-layer)

Party svgs

Cups Batter each pan

6" round

12

10

2 - 4 / 1 mix

8" round

24

15

3 - 6 / 1 1/2 mixes

9" round

43

20

4 - 8 / 2 mixes

10" round

38

25

5 - 10 / 2 1/2 mixes

6" round 3"

-

5

2 / 1/2 mix

8" round 3"

-

10

4 / 1 mix

10" round 3"

-

15

6 / 1 1/2 mix

9x13

24

20

8 / 2 mixes

double 1/4

50

35

3.5 mixes for two

12x18

54

30

12 / 3 mixes

double 1/2

98

60

3 mixes each

6" square

18

10

2 - 4 / 1 mix

8" square

32

20

4 - 8 / 2 mixes

10" square

50

30

6 - 12 / 3 mixes


   If you have a scale – 1 mix yields 4 cups or 2 lbs. or 32 oz. (30oz. w/the recent cut)

  Where the above says 2 cups – you’ll put 1 lb.  Or 16oz. (15oz.)

Small batch Decorator Buttercream

1/2 lb. Crisco (1 1/8c.)  - 8oz. (I use7.5 oz.)

   can use part or all butter but won’t work as well 

   Walmart–shortening (whiter, similar to hi ratio)/vegetable shortening 

      check out the taste test done by Karolyns Kakes on YouTube

2 lb. powdered sugar

scant 1/2 c. milk or water  - warm helps it mix better

 hold back some liquid for stiffer frosting – it will stiffen a bit when the water cools

 if you’re frosting cupcakes, a thinner frosting will be easier on your hands.

1 tsp. flavoring each - clear vanilla & clear butter 

1 tsp. salt (mix with the warm water)

After all powdered sugar is added, stop and scrape bowl well. 

Continue to mix on low for 2 minutes. 

Chocolate Buttercream

Sub 1 lb. powdered sugar with ¾c. cocoa (SACO dutch cocoa is my fave)

 (I purchased it at Dierbergs, unfortunately they have stopped carrying it)

Add flavoring and salt (and cocoa) to shortening and start mixing on low. 

Alternately add powdered sugar and water while mixing. 

After all powdered sugar is added, stop and scrape bowl well. 

Continue to mix on low for 2 minutes. 

cake mix extender 

1 1/2 cups all-purpose flour  

1 cup sugar  

2 teaspoons baking powder  

1/4 teaspoon baking soda  

Mix all ingredients together in a ziploc and store in fridge. 

add a couple Tbsp. to a half mix to get 12 cupcakes

3 Tbsp. to a full mix to get 24

I just use a couple Tbsp. out of another mix since I go through so many

When making cupcakes, a cookie scoop is best for even sized 

I use the large Pampered Chef scoop (holds approx. 3 Tbsp.)

Quick Fix Chocolate Cupcakes****

This is my 'vegan' recipe - uses ingredients you probably always have on hand

1 1/2 c. flour                                  makes 18 cupcakes

1 c. sugar                                        fill liners 2/3 full

1/4 c. cocoa powder                     bake at 375 16-18

1 tsp. baking soda

1/2 tsp. salt

1/4 c. + 2 Tbsp. oil

1 tsp. vanilla

1 Tbsp. vinegar

1 c. hot water

Cake goop – DIY pan release

Even amounts: Crisco, oil, flour

Mix well, does go bad eventually

WASC-popular cake mix adaptation

1 box mix

1 c flour

1 c sugar

Dash salt

½ c melted butter (optional)

1 c milk

1 c sour cream

1 small pkg pudding (optional)

4 egg white (or 3 whole eggs)

1 tsp almond

This will yield the equivalent of 1.5 mixes so adjust pan size accordingly.

https://delishably.com/desserts/Cake-Decorating-Basics-How-to-Extend-a-Boxed-Cake-Mix

my web-site  www.terisdesserts.com feel free to steal ideas ;)

find links to Meramec classes here https://terisdesserts.com/classes

There is a list of ‘my’ classes there too.

How the above cakes are done:

cat - leave one of your layers domed for the head. you can even put the dome from the other layer on top to make it taller. this works great for ball cakes too. the hat is a sugar cone, face/ears are fondant, paws are buttercream.

3 tier cake using 6"(1/2 mix) 8"(1 mix) 10"(1 1/2 mix) 3"tall pans

this is a great way to have 3 different design elements and potentially 3 cake flavors.

light blue cake - side is frosted first and smoothed. the top is done next, along with a small amount on the top and bottom, then these are smoothed.

pink/blue cake - frost the cake in white, 'swipe' on some color, then smooth all together.

rosette cake

petal effect cake

sprinkle covered cake

pastel palette painted - frost/smooth base coat. swipe on some colors, but don't smooth them

  watch some 'palette painting buttercream cake' tutorials - so fun

pink flowers - imprint pattern with cookie cutter, fill in, smooth (like lily pulitzer designs) or not (adds texture/interest)

brown design - pattern is made with the metal strip from a wax paper box, then piped over

stone look - pattern is pressed on with an impression mat


on this blog:

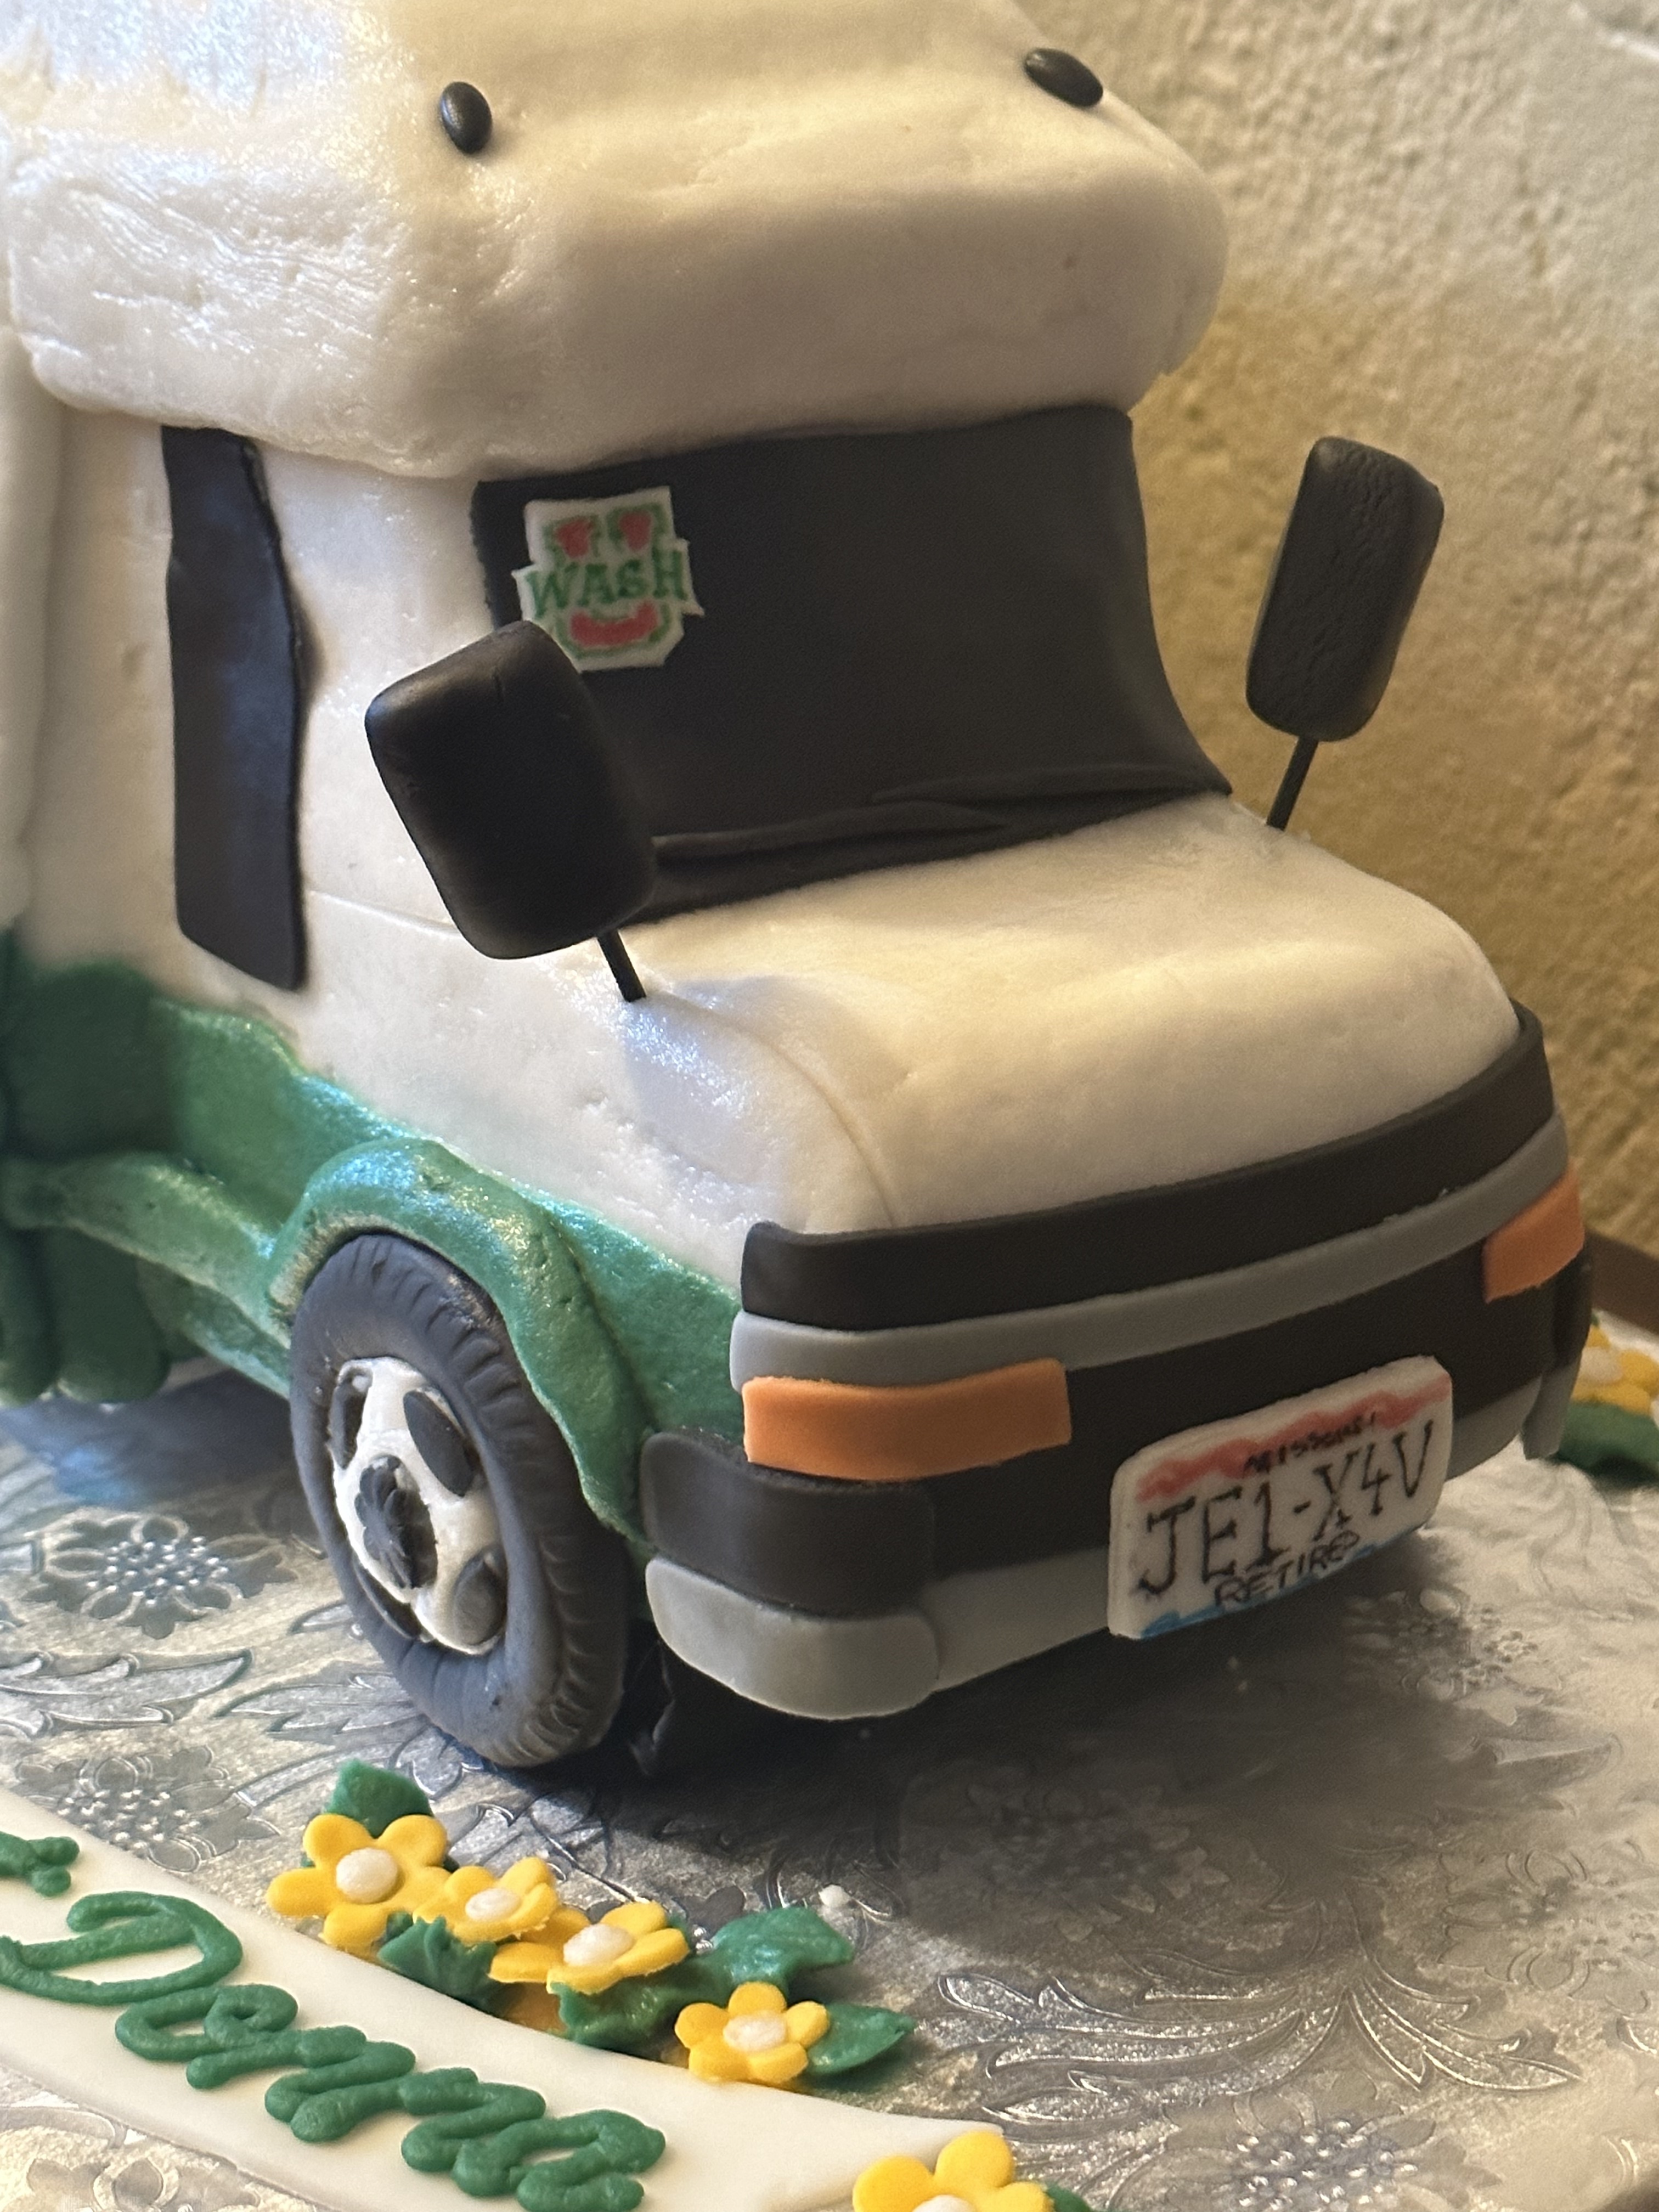
3/26/23-sprinkled filled cake/jersey cake/RV cake

2/19/23 – how to make a Faultline cake         

2/15/23 – how to make an airplane cake

8/22/22 – the making of a Snoopy cake

9/26/20 - how to assemble a large 3D golf bag cake

2/21/20 - how to make a roller skate RK cake topper

1/1/20 - how to make a dog face cake using cake scraps also how to make a Tshirt cake

9/11/19 - how to assemble a tiered cake also how to frost a square cake

4/24/19 - how to make RK Dino cake toppers

8/21/18 - how to make a shape #3 cake with no waste also a cute simple lamb cake

9/6/16 - how to make MMF marshmallow fondant

9/11/19 how to assemble a tiered cake - Hammer a dowel down the center

Also a video of how to frost corners on a square cake

10/4/15 - #1 Elmo cake using the multi use cake pan (love it!)

8/16/15 - 3D 4-wheeler cake

12/30/14 - multi use pan again - shaped #40 + a cake showing a good use for cake scraps

3/11/14 - shaped Dino cake

9/14/13 - Cake made from chocolate chip cookies…

3/24/13 - building a 3D firetruck cake

6/25/12 - Awareness ribbon cake

3/13/12 - 3D frog cake


There's a great video on frosting a cake here:

https://www.lifeloveandsugar.com/how-to-frost-a-smooth-cake-with-buttercream/

I don't use a measuring cup (so I don't have to clean it)

Same with the jumbo tip to frost the sides. You've probable seen the Cake Boss use this technique.


Check out: YouTube – Buttercream Flower Series


Sunday, April 7, 2024

Who likes Apple Fritters?

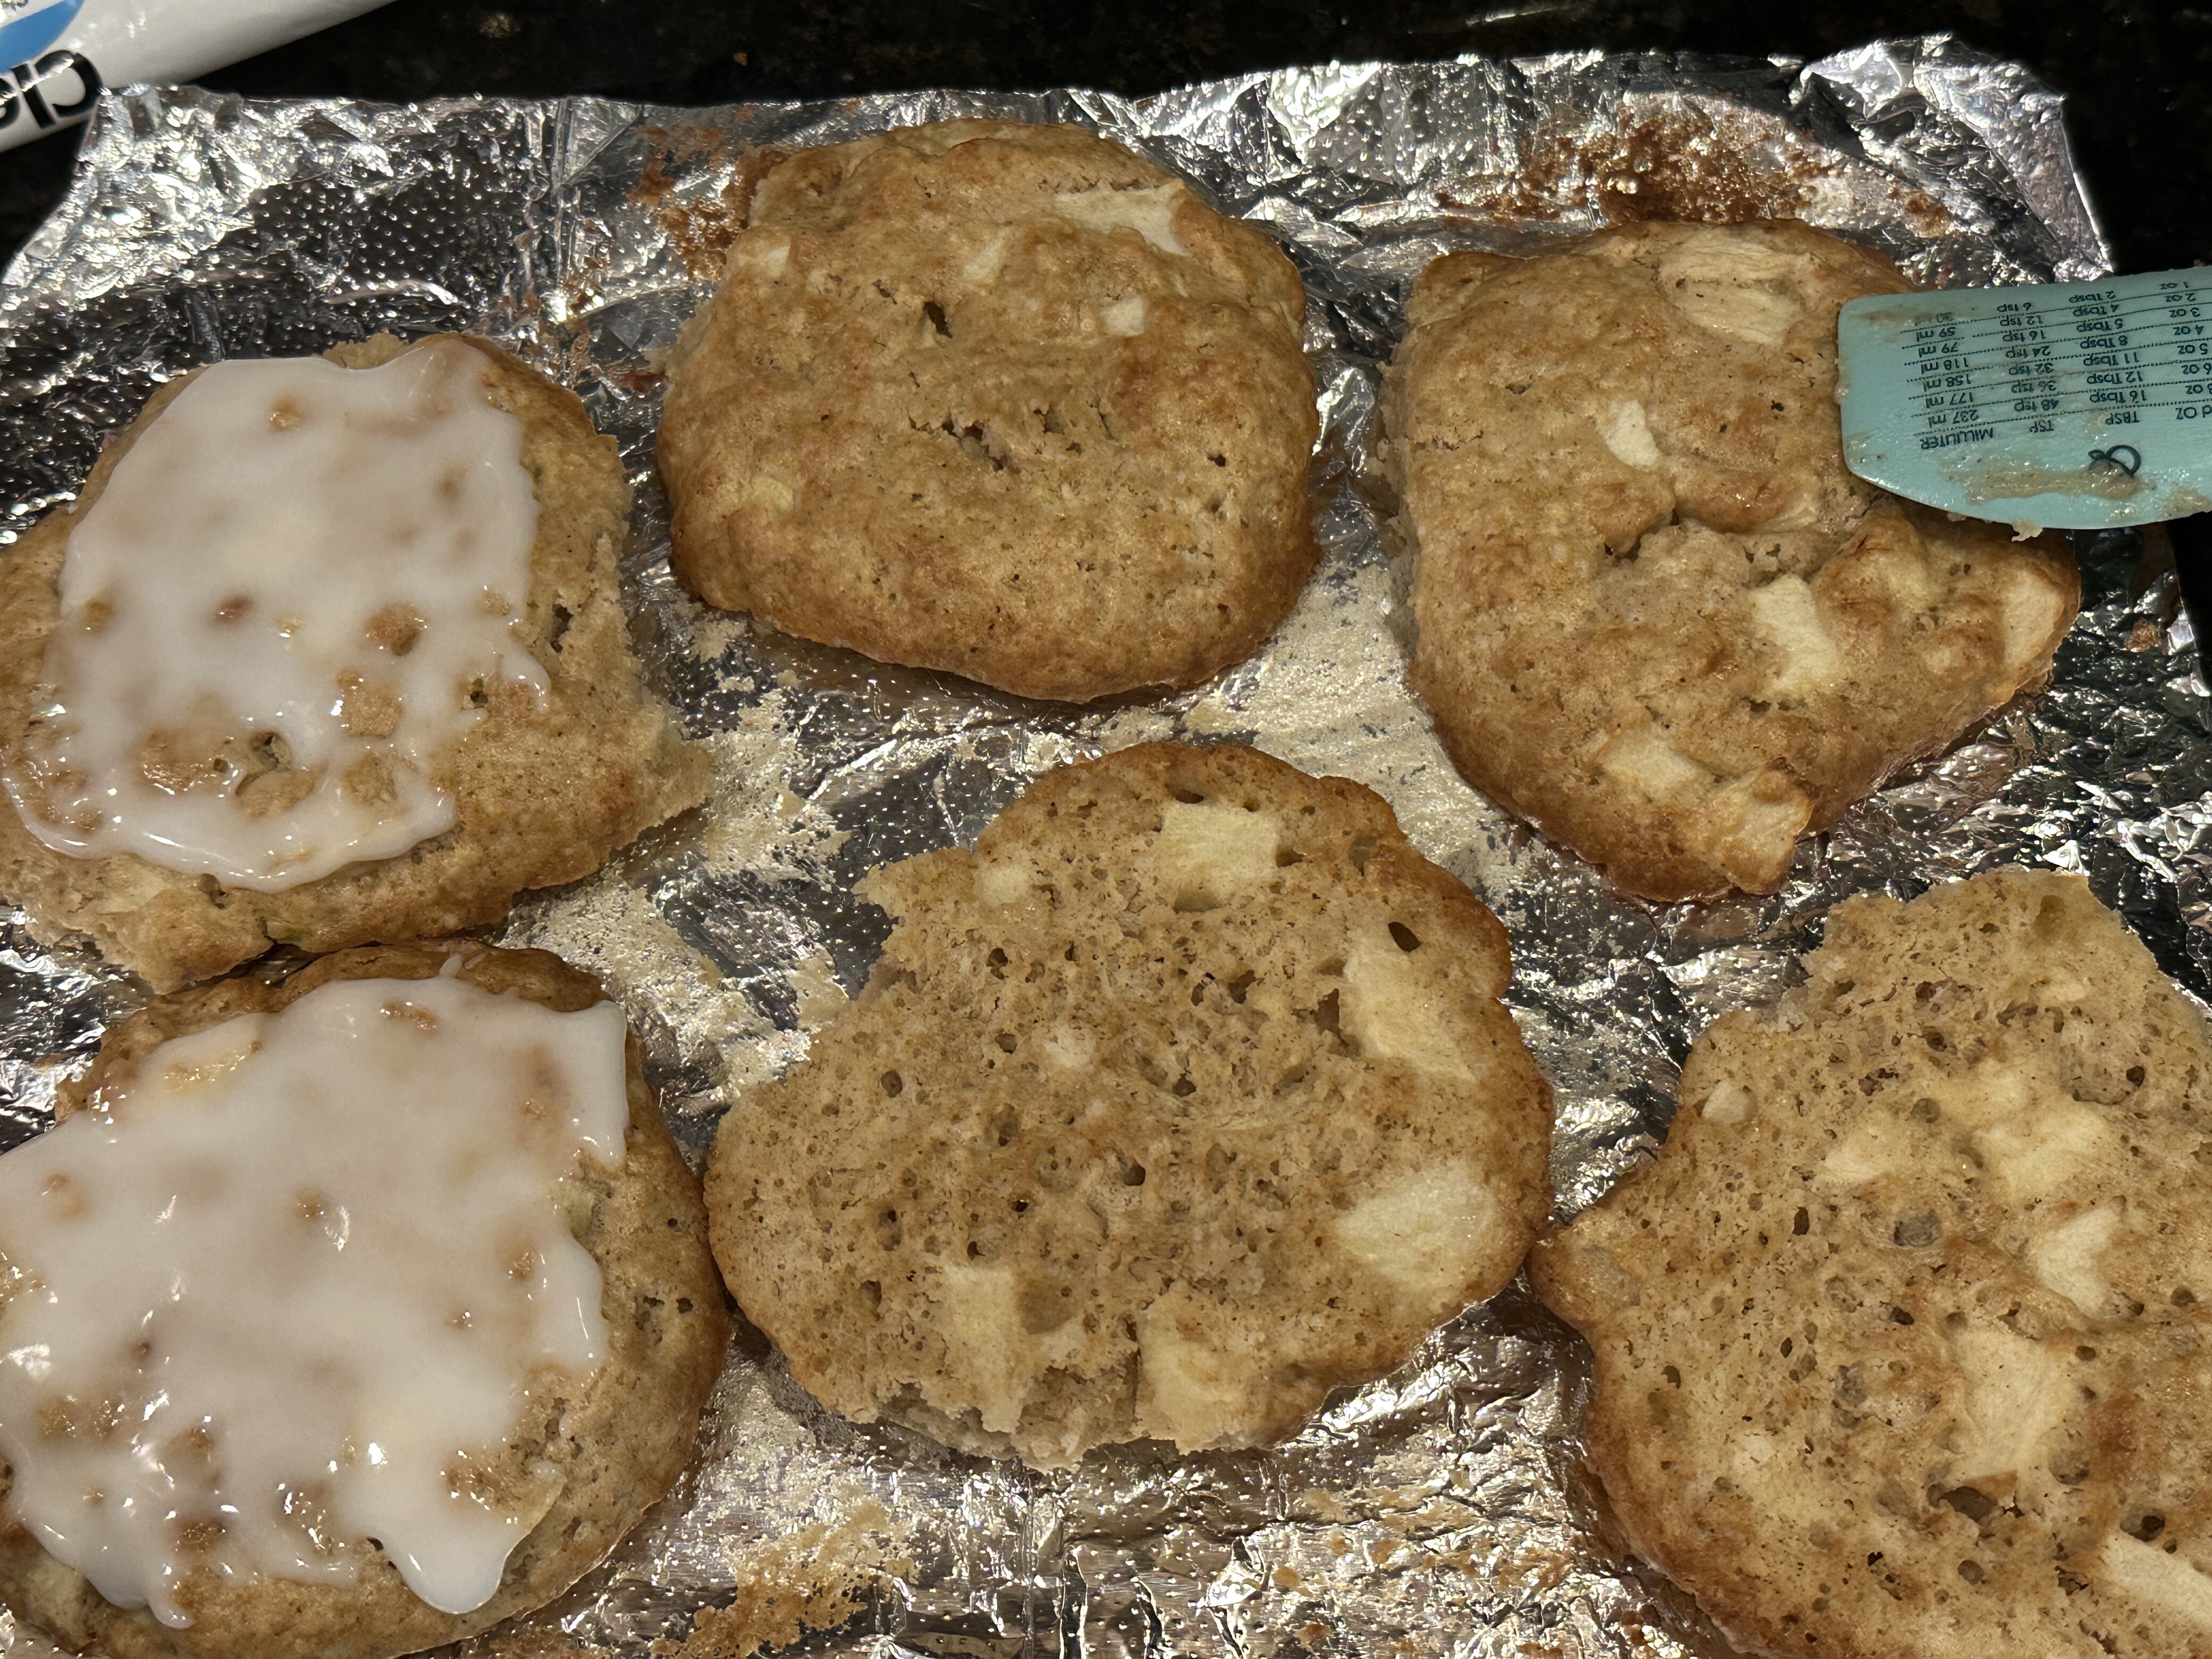
I often crave an apple fritter...but refuse to go get one. I tried one air fried one, meh. Today I thought I'd try again. I mixed up the 'Baked Apple Fritters' recipe found at https://nodashofgluten.com/baked-apple-fritters/ I used all AP flour, Granny Smith apple, forgot the vanilla, didn't miss it, but I did enjoy the taste of the nutmeg. I did not follow the bake/broil directions. I was determined to air fry them. Line your tray with foil. Use a cupcake scoop for a regular size fritter. (flatten them so the center gets cooked) I got 12 of that size plus 1 jumbo. On foil, cook 350 5 minutes, flip over, (doesn't need to be on foil), 5 more minutes. Flip back over, put a bit of glaze on top (use foil or you'll have a mess), 390 3 min, add more glaze, enjoy.


Wednesday, March 6, 2024

Cupcake 101

 Everything you need to know to make & decorate cupcakes - all in one spot!

Cake mix, or scratch?

To make a cake mix taste homemade:

Use butter in lieu of oil

Add an extra egg

Use milk (coconut milk, juice) instead of water


A cake mix doesn’t make 24 cupcakes anymore

Use this to make it go farther


Cake Mix Extender

1 ½ c. all purpose flour

1 c. sugar

2 tsp. baking powder

¼ tsp. baking soda

Mix in a Ziploc and store in fridge

Add 3 heaping Tbsp. to a mix.


Quick fix chocolate cupcakes

Great recipe using ingredients you probably have on hand

1 ½ c. flour

1 c. sugar

¼ c. cocoa powder

1 tsp. baking soda

½ tsp. salt

¼ c. + 2 Tbsp. oil

1 tsp. vanilla

1 Tbsp. vinegar

1 c. hot water

Makes 18 cupcakes

Fill liners 2/3 full

Bake at 375 16-18 min.

Use a scoop to evenly distribute the mix into cupcake liners.


The #24 scoop (disher) is perfectly sized for cupcakes.

Line your pans with cupcake liners. The ones that come in a container are more likely to sit nicely in the pans as opposed to the cute ones that come in bags as they tend to ‘stretch’ out.


Don’t leave cupcakes to cool completely in pans as the moisture may cause the wrapper to release from the cupcake.


If you want the bottom of your paper wrappers to look nice after baking, sprinkle some uncooked rice in the bottom of each well. Save and reuse.


If you want heart shaped cupcakes, use a ball of aluminum foil.


Gently tap the pan on the counter to settle the batter and minimize air bubbles. 

Not so hard as to dislocate the liners.

Don’t overfill your cupcakes – this will lead to very large domed tops.

Bake cupcakes at 350 for 15-20 minutes. Mini cupcakes take less time.


Check your oven temperature! Rotate cupcakes halfway.

Frost your cupcakes withing 48 hours of baking.

Freeze your well wrapped cupcakes a max of 3 months.


https://www.howtocookthat.net/public_html/how-to-pipe-butter-cream-flowers-using-only-a-ziplock-bag/

https://www.howtocookthat.net/public_html/8-piping-hacks-know/


Cupcakes should be cooled completely before frosting or before freezing.


https://www.lifeasastrawberry.com/cupcakes-101-10-tips-to-bake-the-perfect-cupcake/

https://www.lifeasastrawberry.com/cupcakes-102-how-to-frost-the-perfect-cupcake/

https://www.lifeasastrawberry.com/cupcakes-103-14-ways-to-decorate-cupcakes-like-a-pro/

Lots of fun topping/décor ideas here, even some advanced ideas.


https://www.lifeasastrawberry.com/cupcakes-104-how-to-store-and-freeze-cupcakes/

Includes a timeline for prepping for a party.


Add filling to your cupcakes. You can core out the center using a cupcake corer, an apple corer, or a paring knife, but it’s not necessary if you have a star tip.

Just squeeze some filling into the cupcake with a bag and a tip.

If filling with a chunky filling, small candies, etc. a core is best.

https://youtu.be/9Iblr21p208 to see a cupcake being filled


Small batch Decorator Buttercream

1/2 lb. Crisco (1 1/8c.)  - 8oz. (I use7.5 oz.)

   can use part or all butter 

   Walmart–shortening (whiter, similar to hi ratio)/vegetable shortening taste test

2 lb. powdered sugar

scant 1/2 c. milk or water  - warm helps it mix better

 hold back some liquid for stiffer frosting  it will stiffen a bit when the water cools

 if you’re frosting cupcakes, a thinner frosting will be easier on your hands.

Use clear flavoring if you want white frosting

1 tsp. clear vanilla flavoring 

1 tsp. clear butter (omit if using butter)

1 tsp. salt 


Chocolate Buttercream-

Substitute 1 lb. powdered sugar with ¾c. cocoa (SACO is my fave) 

Limit water to 1/4 to 1/3 c.


Add flavoring and salt (and cocoa) to shortening and start mixing on low. 

Alternately add powdered sugar and water while mixing. 

After all powdered sugar is added, stop and scrape bowl well. 

Mix on low for 2 minutes. 


It’s not necessary to have a lot of specialty bags & tips. Ziploc bags will work just fine.

You can put multiple colors of frosting in a bag, or add a stripe of food color up the side.


Pipe frosting on top, then flip cupcake upside down on wax paper, place in freeze for 10 minutes - Perfectly flat tops for decorating!


Tips

1M(open) vs. 2D(closed) – start on the inside vs. the outside for pretty rosettes

Use like a star tip with a blend of colors for hydrangeas

1A – 1 blob or all the around, start with a center blob to get tall


Vary tips to add texture.

Want to just use your spatula? Check out this video for a variety of ways https://youtu.be/RW4pZYe_6FY

Saturday, November 25, 2023

Cookie Decorating 101


                                 MAKING COOKIES should be easy and FUN! 

                        Make a cookie plan. Spread your project over several days.


Dough Recipe – Roll out as thick or as thin as you prefer (but be consistent). Baking time will need to be adjusted as depending on the thickness you choose. Dough can be made ahead and kept in the refrigerator for a couple or stored in the freezer for a month.

You can freeze - dough, cut out cookies, (baked or unbaked) to save time later.

Frosting Recipe – Royal Icing (contains meringue powder) vs. Glace (contains corn syrup) Most people use either one or the other. I use both. I find Glace tastier & easier to 'frost' with, so I use that for the base frosting and then I use royal icing to decorate. You should use whichever you prefer to work with and eat.  Make frostings ahead and keep in refrigerator, but bring all items to room temp before using.  Keep cookies level when frosting, moving, etc. to avoid getting cracks in the frosting since it is 'self-leveling'.                                              

Roll out cookies – between two sheets of waxed paper, use rolling pin guides for consistent thickness. Make your own guides with a wooden ruler or have someone cut you a thin strip of wood to match whatever thickness cookie you desire. Cutout cookies can be frozen (wrap well), either baked (will be just a bit more fragile after defrosting) or unbaked. Can bake cutout cookies from frozen, but will need to bake for a couple extra minutes. 

Cut out - cutters don’t have to be used only one way. Combine two shapes together, or cut off part of a shape. Make your own template using a plastic lid or contact paper. Trace around the shape with a fondant cutting tool (like a little pizza cutter) instead of a knife so you don't cut through your waxed paper.

Bake – Bake on parchment (wipe and reuse several times). This recipe does not spread. Cookies can be placed about 1/4" apart. If they do touch when baking, use a zester to clean the edges after they cool. Rotate cookie sheets halfway through baking in case your oven has a hot spot. Keep an eye on these, it only takes 30 seconds to 1 minute to burn! After baking, I 'iron' my cookies. I use a fondant smoother to press down on the top (no actual iron motion). This isn't necessary, but if you do see a bubble, you might just press on it with a spatula. Store cookies in an air-tight container until ready to decorate. Room temperature is fine for 3-4 days. Any longer, think about refrigerating or freezing them.

Decorate - use sugar, sprinkles, royal icing layons (make ahead of time-see tutorial link below) or fondant to decorate quickly. Pipe royal icing or glaze onto wet or dry cookies.  The base coat must dry for 24 hours before piping on top in a dark color to avoid bleeding. I prefer not to risk this, so I pipe immediately or use the RI layons.

Cookies frosted with glace do not freeze well.


I prefer to frost with glace, then immediately decorate with royal icing (or glace) for a 'wet on wet' design.

Glace will 'sink' into the wet base frosting. If you prefer your decoration to 'sit' on top, decorate the top right away with stiff royal icing (or glace thickened with powdered sugar). If piping in white, you can wait just a bit before piping to make it sit on top, but you'll need to wait 24 hours in order to pipe in colored royal icing. The cookies need a full 24 hours to dry completely. Don't stack them before that. 


After frosting cookies, put them in front of a fan for 30 minutes or so to help minimize the chance of butter bleed.


side note-in my attempt to introduce you to both types of frosting (glaze vs. royal icing) you may be confused as to when to use either.
Most cookie decorators are all one or the other frosting types. I'm different in that I use both types for different things.
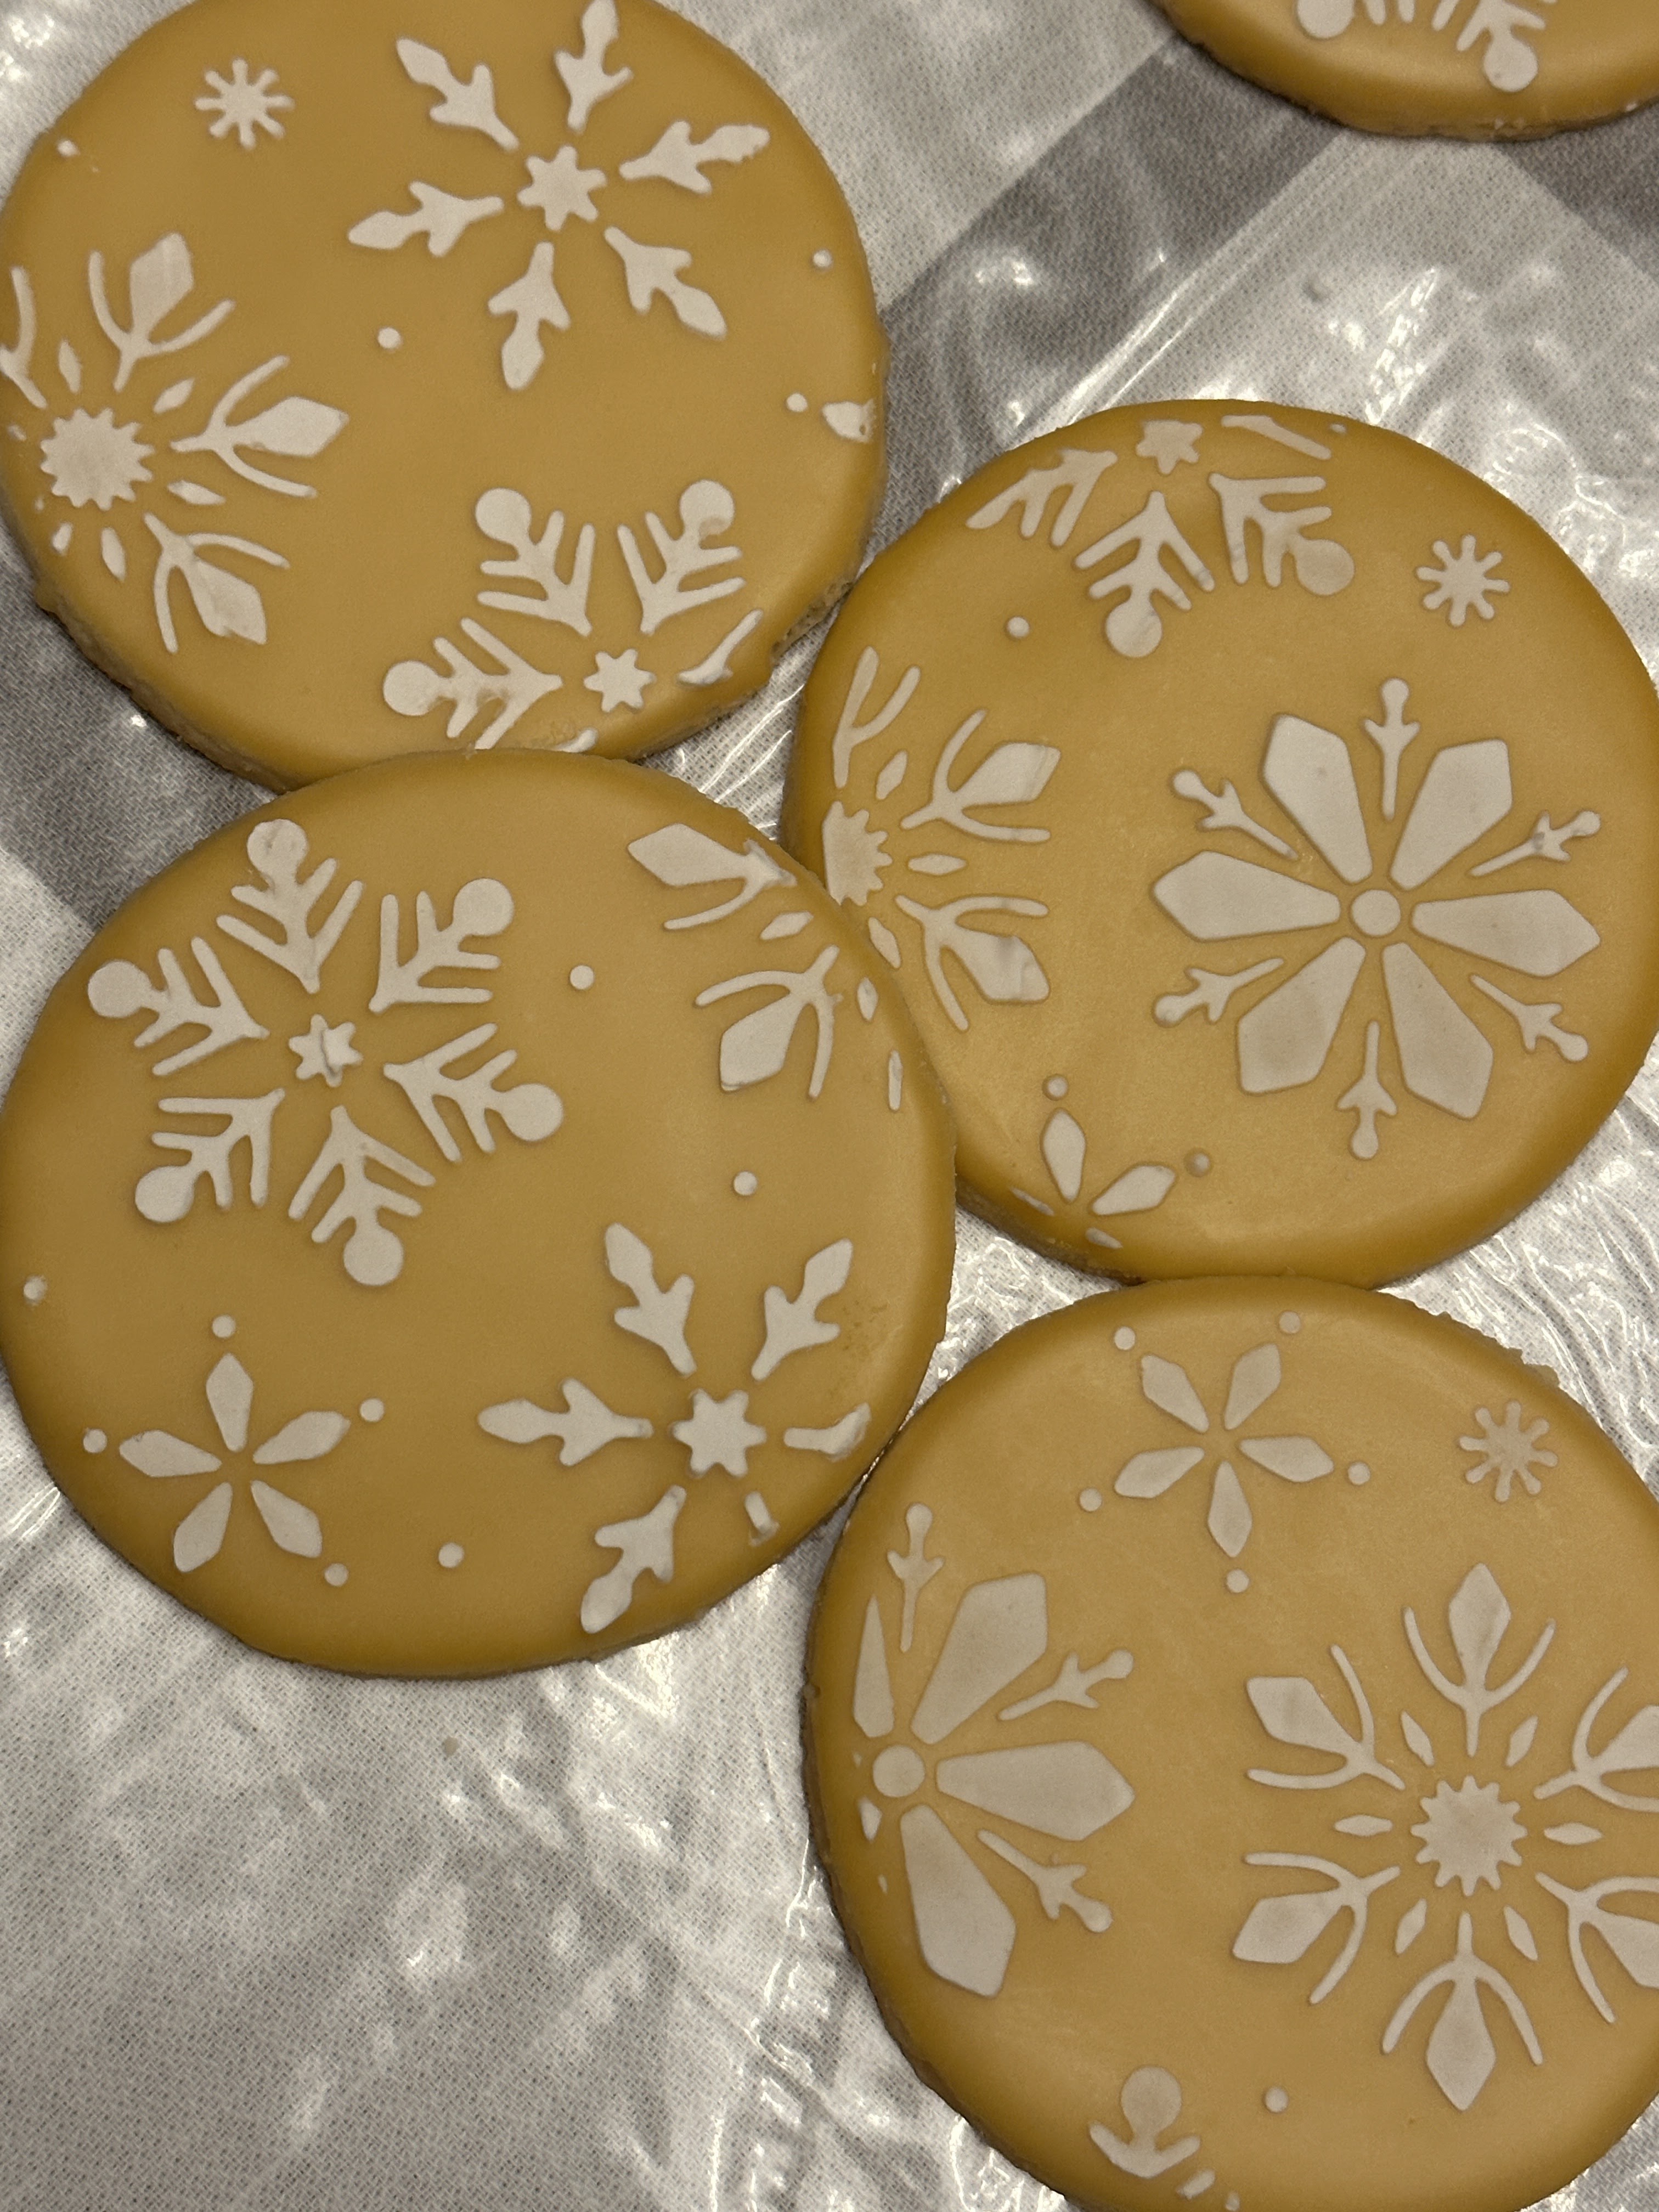
I always frost my cookies with glaze because I prefer the taste and I find it easier to get a nice smooth finish. Plus dipping is super quick! I then use pre-made decorations (placed on wet cookies) or I stencil (on dry cookies) - all with royal icing. You do not need to use both types of frosting. You can stiffen up glaze with extra powdered sugar to make it stiffer so it 'sits' on top. Just make sure not to pop your bags (you can double those up). Royal icing is much easier to pipe than glace (with the corn syrup).
You can also thin royal icing and dip it, or use it for the 'wet on wet' look.
Another option is to make some frosting without corn syrup or meringue powder and use that for decor.
This will be much easier to pipe than glace.
Try all and see which you are more comfortable working with and which taste you prefer.

The tipless piping bags can easily be washed and reused many times.
Don't forget to lay the seam flat before cutting the end.
You can also use ziplock bags with a tiny tip cut in one corner.

google 'frankenfrosting' and 'modified glaze' if you want even more frosting options

Wilton Sugar Cookie – also known as No Fail Sugar Cookie ‘NFSC’

1 c. butter-softened (not melted in microwave)

1 c. sugar

1 tsp. vanilla

1 egg

2 tsp. baking powder

3 c. flour

Mix in a Kitchen Aid, cut recipe in half for a hand mixer or you'll burn up the motor.

Bake on parchment at 350 for 10-11 min 375 8-9 minutes. Adjust to your oven of course. Rotate trays halfway through baking. The higher temperature you use, the closer you'll need to watch your cookies. I bake at 365 for 5 minutes, rotate, bake 4 more minutes, then I check every 30 seconds or so.

Dough can be used right away, refrigerated 3-4 days, or frozen for up to a month.

Microwave gently to make it easier to roll out.


Glace Frosting

2 lb. powdered sugar

½ c. water + extra if needed after the corn syrup is needed

1 tsp. clear extract of choice

I use clear butter flavoring

Add white food color (I use 12 drops) to limit butter bleed.

¼ c. corn syrup - I add this at the end


Make frosting a bit thicker until you get more comfortable using it. I use a small spray bottle to thin if/when needed.

Icing can be kept in the refrigerator. Be sure to bring everything to room temp. before using.

This frosting dries hard to the touch but stays soft to the bite. 

Keep frosting covered when not in use to avoid it thickening up.

The corn syrup settles, so be sure to mix well if it's been sitting.

Cookies need 24 hours (uncovered) to dry completely before stacking.

Don't forget the fan for the first 30 minutes.


Small Batch Royal Icing

2 Tbsp. Meringue powder

¼ c. water

Mix well

Add 2 c. powdered sugar

I like to add a tsp. or so of corn syrup to add a bit of shine

1 tsp. clear flavoring

Mix on low for 7 minutes

Try to avoid adding extra water unless you absolutely need it, then only a drop at a time.

Refrigerate leftovers, mix well prior to using as it tends to separate.


Here are a couple very helpful tutorials:

https://thebearfootbaker.com/beehive-royal-icing-transfers/

https://thebearfootbaker.com/beginners-guide-to-cookie-decorating/

Visit here https://terisdesserts.com/classes to see a video of me dipping a cookie.


Friday, November 3, 2023

Some of my favorite Instant Pot recipes:

**remember to always add liquid to your IP**

Spinach Artichoke Dip

Ahead-defrost spinach, set out cream cheese
To make dip-Saute 1 chopped onion + garlic to taste in 2Tbsp. butter
Turn off heat, add:
1 8oz. (less fat) block cream cheese - softened
1 can artichoke hearts - cut into small pieces
(much easier to do with kitchen shears)
1 box frozen spinach - defrost and squeeze all the water out first
couple dashes hot sauce + crushed red pepper flakes to taste
1 cup shredded cheese (Swiss/gruyere mix from Aldi or mozzarella)
1/4 to 1/2 c. grated parmesan
1/2 c. mayo or plain greek yogurt or sour cream
Measure 4 oz. into individual ramekins,
add more cheese on top, cover with foil.
Recipe yields 8 - 8HI QPR
Tip-Remove foil and place in air fryer to brown top
Be sure to have the cheese on top for the IP, this way it won't fly around in the air fryer
Can freeze ahead and cook from frozen. Keep cook time the same.

Beef Broccoli
Ahead-put beef in freezer for 1 hour, make rice and set aside
Can prepare sauce and slice beef and put both in fridge ahead of time
Can also put frozen vegis in fridge to start to defrost them
It is not necessary to precook or marinate the steak
In Instant Pot-stir together meat & sauce
1lb. Top Sirloin steak sliced thin (freeze 1 hour for easier slicing)
Sauce-1c.beef broth 1/2c.soy sauce 1/3c.brown sugar 1T.sesame oil
1/4tsp. red pepper flakes, optional ginger & garlic to taste
optional-add diced onion 
Seal lid 7HI QPR press cancel (release steam carefully & open lid) then press saute:
mix 2T Cornstarch + 2T Water – add in (when sauce is bubbling) stir til thickened
optional-add 1 can each bamboo shoots and water chestnuts
plus 1 or 2 bags frozen Broccoli or Asian vegis
if you remembered to defrost the vegis overnite, it will heat up quicker
Optional fresh broccoli and/or julienned carrots – will need to cook a bit longer

Long grain white rice (not quick) 1:1 (rice to water) 4HI 10NPR
Brown rice 1:1 22HI 10NPR
If you're worried your rice might stick, put rice and water in a bowl or pan uncovered on a trivet
Place the minimum 1 c. water in the bottom

Cajun Chicken Pasta
Ahead-dice vegis & chicken, saute til chicken is cooked through, add spice and keep in fridge
You could cook on high to get a little char if you like that
I usually do 1 to 1 1/2 lbs. chicken, 1 large onion, and most of the 3 large colored pepper combo
Use more veggies than you think you need, they tend to get lost 
Use Tony Chachere’s Creole seasoning to taste
Make 1/2 or whole batch of white sauce-I don't add cajun spice to this
If there are leftovers, it can be used for Pasta con Broccoli
In Instant Pot, make pasta (use 9-11min pasta) use chicken broth for extra flavor) 3HI QPR
(You could do 4HI QPR if you like your pasta more done, but it will cook while warming the other stuff)
remove some or all water
Add some or all sauce & chicken & vegis - heat through on saute, make sure it doesn't stick to bottom

White sauce – 8oz. Cream cheese ½ c. butter 2 c. milk ½ c. parmesan lots of garlic salt
Great for Pasta con Broccoli

Shrimp Risotto
Ahead-defrost shrimp
In Instant Pot, saute in 2T. butter + 1T. olive oil - onion (1 small or more) + garlic, tsp. or more
These both tend to 'disappear' in your risotto.
Add 3/4c arborio rice, saute til it’s ‘toasted’ (a bit of color is added)
Add ¼ to ½ c. white wine to deglaze-cook on saute til wine is absorbed
Make sure the bottom is scraped clean to avoid the burn notice. 
Maybe prep up to this point earlier in the day to make dinner easier?
Don't add the stock til actually ready to cook, it may ruin the texture.
pour in 2c (fish or lobster) stock 
10HI QPR press cancel,  press saute,  add shrimp, optional-crab, fresh mushrooms
4T. fresh grated parmesan + 1T. butter, parsley
Cook just til shrimp is pink

Caesar Dressing
whisk: 2Tbsp lemon juice / 1clove minced garlic / 1tsp Worcestershire /
1.5tsp anchovy paste / 1.5tsp Dijon
Stir in: 1cup (Mayo/plain Greek Yogurt) / 1/2cup grated Parmesan / 1/4tsp salt & 1/4tsp pepper

White Chicken Chili-super quick
Ahead-chop up leftover chicken, make sure pantry has canned goods
In Instant Pot, saute 1 onion, 4 cloves garlic in a bit of olive oil
add 4 cans great northern white beans,
optional 1 can canellini beans (drained and rinsed)
1 4oz. can green chilies
2 c. shredded cooked chicken
2 c. chicken broth
2tsp. cumin or more to taste
1tsp. Each coriander, cayenne, oregano
If you want to eat soon, cook on HI for 0 (zero) minutes! NPR or QPR
Or just turn on slow cook and heat through & serve
You could thicken this by using an immersion blender, very briefly
Or use cornstarch mixed with milk or water

Cheesecake
This is for a small 6" cheesecake (double for a 7")
Ahead-set out cream cheese and eggs
Crust-Crush 3 whole graham crackers, mix in 1Tbsp. melted butter,
1 tsp. sugar, dash cinnamon - Press firmly in bottom of pan
Line pan with foil for easy removal
Pop crust in air fryer at 330 for 5 minutes - let cool
All ingredients should be at room temp. to avoid lumps
mix 1/3c. sugar into 8oz. room temp. cream cheese
(soften in microwave if necessary)
add 1 egg, 1 tsp vanilla, 1 Tbsp cornstarch, 1/4c (vanilla) greek yogurt or sour cream
Pour over crust - can add strawberry cake filling to decorate
Put minimum 1 c. water in IP, place foil covered cheesecake on trivet
Single ‘batch’ in 6” round – 35HI NPR
Double ‘batch’ in 7” round – 45HI NPR
Cool to room temp & refrigerate minimum 4 hours or overnite (best)
Make a note for next time as to too thick or thin - may want to add/subtract a couple minutes